Christmas morning is one of the most magical moments of the holiday season. Even as adults, it's hard not to have that kid-like anticipation to see what Santa left under the tree. Although opening presents in your PJs is one of the best parts of this festive season, we can often forget to take that extra time to look put-together for the inevitable family photo ops. In this week's tutorial, we have Elanna showing you 3 Christmas Morning Hairstyles - each look will only take you five minutes!
To upgrade your Christmas bedhead, enjoy the tutorial above, or keep scrolling down for a step-by-step guide on how to recreate each beautiful hairstyle.
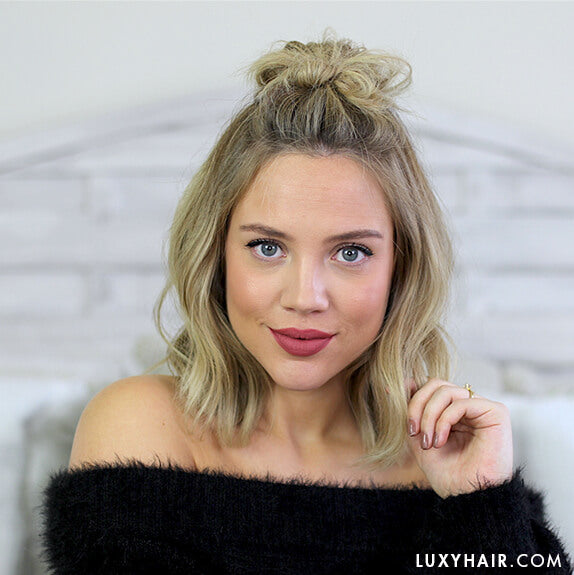
Look #1 - Messy Half Top-Knot

This messy half top-knot hairstyle is suitable for all lengths of hair - you just need enough hair to throw up in a messy bun on top of your head. Of the three looks, it is definitely the quickest one - especially great for Christmas morning when you're in a rush and you just want your hair out of your face. Best of all, it takes no time whatsoever.
Tools Needed:
- One (1) small clear elastic
- Two (2) bobby pins
- Wave Spray
- Optional: Luxy Hair extensions
How-To:
1. Section off the top section of your hair at the crown of your head. Adjust the amount of hair you pull up on the sides depending on how much volume you want on the sides.
2. Once the hair is positioned to your preference, grab a small clear elastic. Gather your hair into a small messy bun and secure with an elastic. To avoid the bun looking too upright, use a couple of bobby pins to secure the bun flat to the head.
3. To create a more undone look, use your fingers to pull out some baby hairs around the face. For added texture, use a wave spray to enhance your natural texture. If your hair is naturally straight, experiment with one of our favorite heatless curling methods (here) for that effortless look.
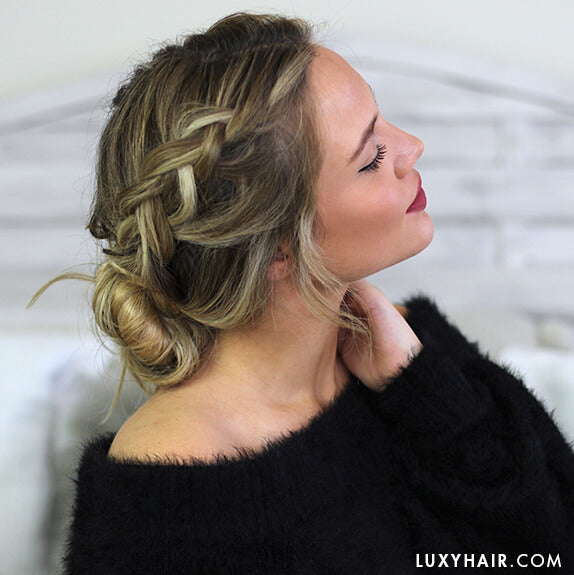
Look #2 - Double Dutch Braid Messy Bun
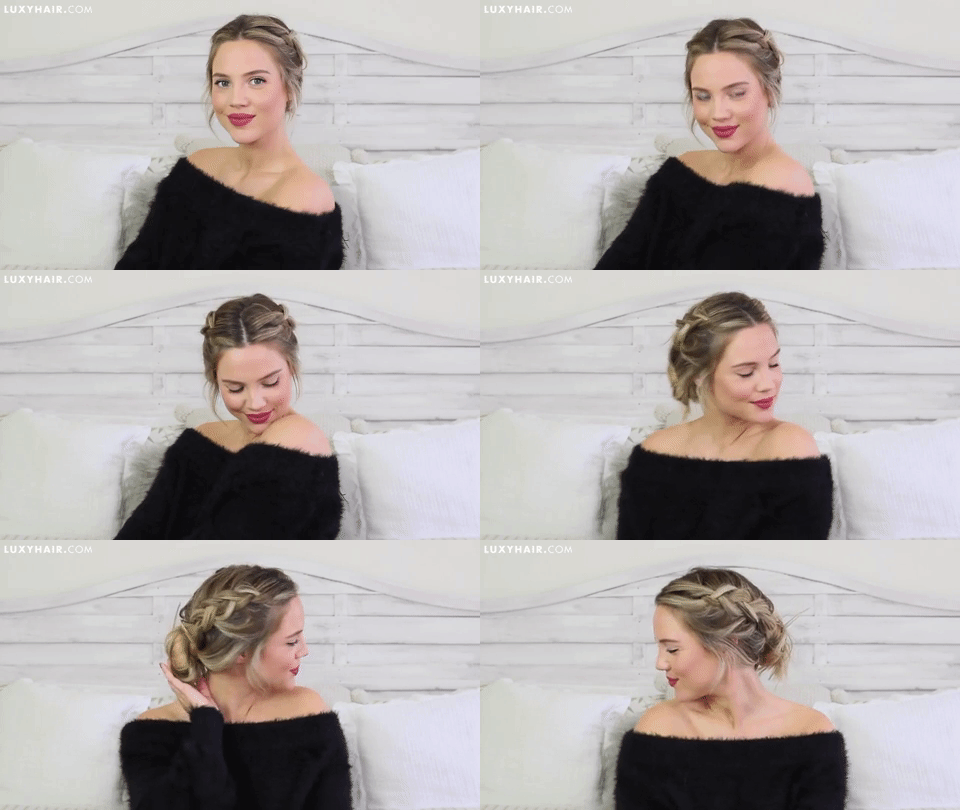
This hairstyle is ideal for those with medium length hair but can easily be adapted for shorter locks with the addition of Luxy Hair extensions. For a more girly and put-together look, pull the braids tighter. In this tutorial, Elanna opts for a more effortless and undone look - perfect for a casual Christmas morning with family.
Tools Needed:
- Three (3) small clear elastics
- Two (2) bobby pins
- Optional: Luxy Hair extensions
How-To:
1. Starting at the top of your head, part your hair to your liking. In this tutorial, Elanna goes with a middle part to have a more symmetrical vibe.
2. Grab a small section on the top left side of your hair and divide it into three strands. Dutch braid your hair by taking the outside strand and crossing it under the middle.
3. Continue braiding until you reach the base of your head. Secure the braid loosely with a small elastic.
4. Repeat steps 2 & 3 on the opposite side of the head so that you are left with two dutch braided sections that end at the base of the head.
5. Now it's time to unleash the braids for that extra voluminous look. Use your fingers to tug at each part of the the braid, loosening it to make it it bigger and messier.
6. Remove the elastics that are holding in the braid, and gathering the rest of your hair, (including the extensions if you're wearing them) scrunch your hair up into a quick messy bun. Secure the bun with a small clear elastic that matches your hair.
7. Don't worry too much about how the bun looks initially. If you're not satisfied with it on the first try, use some bobby pins to tame any stray hairs or fasten the bun more securely to your head. Adjust the bun to your liking and voila - the perfect holiday hairstyle!
Look #3 - Twisted Headband
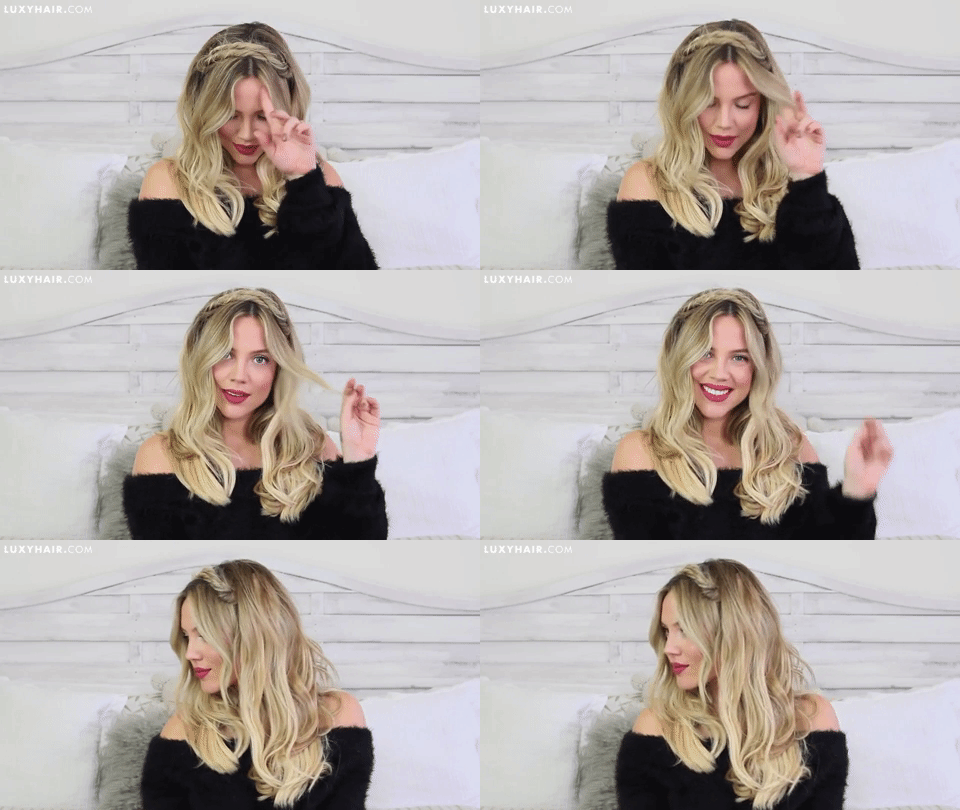
For some of us, Christmas morning is a more formal affair. If you're looking for a quick holiday look that is both glamorous and easy to recreate - search no further. This twisted headband is perfect for those who don't feel comfortable doing a braid but still want to achieve that braided headband look.
Tools Needed:
- Four (4) bobby pins
- Optional: Luxy Hair extensions
How-To:
1. If you wear a extensions, apply your full set as a base for this glamorous look. If you have a short, blunt haircut like Elanna, check out our How to Blend Extensions with Short Hair video here. For this tutorial, Elanna is wearing a combination of our 220g Dirty Blonde and 180g Blonde Balayage Luxy Hair extensions.
2. Next, take a 2 inch section of hair from above your ear. If you are wearing clip-in extensions, be sure to include them into this section.
3. Tightly twist this piece of hair to create the look of a rope. Make sure to keep it nice and tight as it will naturally get looser as you adjust it. Continue twisting until there are 2-3 inches left at the bottom of the section.
3. With one hand holding the bottom of the twist securely, take your thumb and index finger on the opposite hand and pinch the twist. Run these fingers along the length of the hair to created a "frayed rope" texture. As you run your fingers up and down the section, hairs will peek out to create a messy and undone look.
4. Once you're happy with the texture, take the twist and pull it over the top of your head and secure it on the other side with two bobby pins. Hide the bobby pins underneath the rest of the hair and criss-cross them for extra security.
5. Repeat steps 2-4 on the opposite side of your head for a symmetrical look.
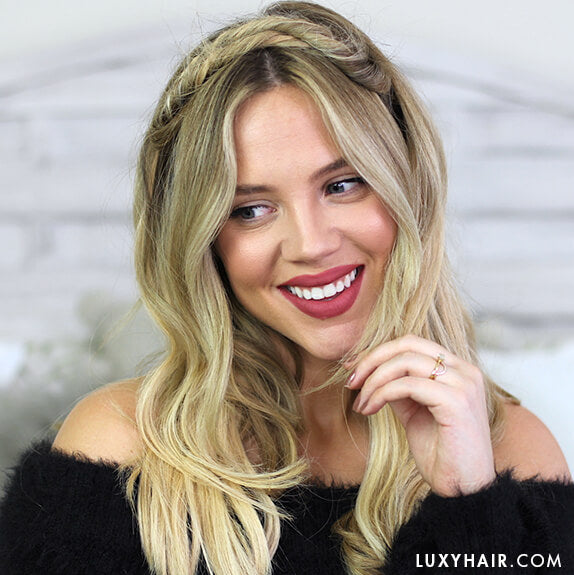
There you go, three super quick and easy hairstyles you can rock for Christmas morning.
If you haven't already, be sure to check out more holiday hairstyles here, here, and here.
Wishing you a beautiful holiday season! We hope Santa brings you everything you are wishing for ;)


