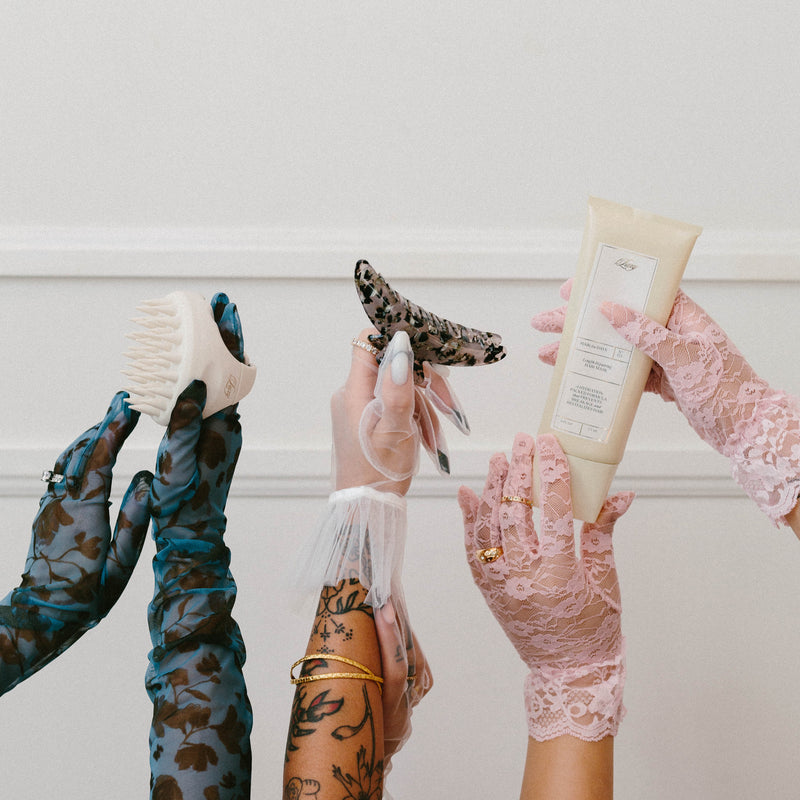
Every bride-to-be knows that having a beautiful hairstyle is one of the key components to looking elegant and picture perfect on your big day. And if you’re a budget savvy bride, you’re probably trying to decide if hair extensions are a worthy investment.
We understand that it can be costly to shell out the big bucks on a set of hair extensions but they can last for months when well-maintained. And rather than wear them once for your special day, why not use your hair extensions for your wedding and also for all the special occasions leading up to it?
Since we want you to get the best return on your investment, we’re dishing out styling tips on how you could get the most out of your extensions before, during and after your wedding day. Here are some hair extension-friendly hairstyles that you can rock during your bridal shower, bachelorette party, honeymoon and even after the wedding festivities are over.
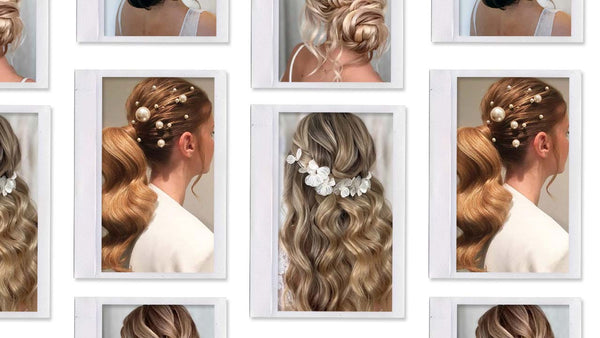
Bridal Shower: Beach Waves
We can’t think of a more elegant bridal shower hairstyle than long, cascading beach waves. This look is perfect for those with balayage or highlighted hair because the beach waves meld together to show off the rich palette of colors throughout your hair. This regal hairstyle will have you looking like the belle of the ball at your bridal shower.
How to Recreate This Look:
All you’ll need to recreate this look is: 1) a heat-protectant spray, 2) 1-inch barrel curling wand, 3) a wide-tooth comb, 4) sectioning hair clips and 5) a strong-hold hairspray. Upgrade yourself from a princess to a queen with your favorite pair of hair extensions.
First you’ll want to section off your freshly washed and blowdried hair into four separate sections using hair clips. Next, starting from the back of your head, unravel a small section of your hair and spritz it with heat protectant spray. It’s important to start from the back of your head because you run the risk of ruining the curls you’ve already done when starting from the front and making your way to the back of your head.
It’s also important to use a heat protectant spray because it helps to create a barrier between your hair and curling wand which helps to prevent heat damage. Once you spritz your hair from root to tip with heat protectant spray, you’ll want to lightly comb it to help work the product into your hair. Since you’re looking to achieve looser curls, grab a larger section of hair (about half an inch).
Now you’ll want to start curling each section of your hair, wrapping your hair around the curling wand for no longer than 7 seconds. Wrapping your hair around the curling wand for no longer than 7 seconds allows you to achieve a softer wave as opposed to super tight Shirley Temple-esque curls. It’s also important that you make sure to alternate between curling towards your face and away from your face. Have you ever curled your hair only to have it all clump into one large curl? You probably didn’t alternate your curl pattern. Alternating your curl pattern towards and away from your face helps to prevent this because each curl is positioned opposite to one another. Continue to repeat this curling motion until your hair is fully curled.
Because you’re going for a soft cascading wave look, you’ll want to separate those curls and loosen them up even more to transform your hair to a beach wave pattern. Start separating your curls with your fingers. Once you’ve successfully separated those locks, using a wide-toothed comb start softly combing through it to get those curls nice and wavy. Finally, apply a strong hold hairspray so you can dance the night away without the fear of your waves dropping.
Optional: dress your hair up with a neutral colored flower crown that acts as an accent to your long flowing locks.
Bachelorette Party: High Ponytail
Let’s face it — sometimes wearing your hair down can be a little stressful when you're laser-focused on having a good time. This is where a classic high-ponytail could be your best friend during your bachelorette party festivities. Not only is a high ponytail a practical hairstyle to help keep your hair out of your face, it also helps to look sculpted by emphasizing your cheekbones and seamlessly contouring your entire face.
How to Recreate This Look:
To recreate this look, you’ll need a set of clip-in ponytail extensions (either straight or curly, depending on your hair type), a loop brush, satin scrunchies, and a strong hold gel or hairspray. We also recommend adding decorative hair clips to help dress your hair up on your special day.
Start by brushing out any tangles in your hair then tying it up as high and tight as possible with a satin scrunchie. Cotton and metal based scrunchies can lead to dryness and breakage to your hair, especially when worn for long periods of time on curlier hair types. Satin-based scrunchies help to keep your hair moisturized, hydrated and breakage-free. Once you’ve tied your hair up to your desired height, apply your clip-in ponytail around your hair, using the interior combs to attach and wrap it around to fasten.
The next step to achieve the high ponytail is applying either a strong hold gel or hairspray to the top portion of your hair to help tame flyaways and achieve that sleek ponytail look. The finishing touch to this look is adorning your hair with pearlescent hair clips.
We recommend placing your hair clips right above the nape of your neck underneath the ponytail. Bachelorette hair accessories like these will help to embellish your hair by adding an extra dose of flare to your ponytail. When your night of partying is all said and done, grab yourself a satin robe (don’t forget matching robes for your girlfriends) and binge-watch romcoms on Netflix in anticipation of your big day. You’ll want to be sure to preserve our beautiful hair by sleeping on a satin pillowcase to match that stylish satin robe on the night before your wedding to help to preserve the moisture in your hair and keep it from getting frizzy.
Honeymoon: Chignon Bun
Of all the styles of buns, there are none more refined and timelessly classy as the chignon bun. A clean and simple chignon bun will help to draw attention to your beautiful face. Similar to the previously mentioned high ponytail updo, we love this refined updo look because it is equal parts functional and fabulous.
The chignon bun is the perfect look for a honeymoon getaway because we know the time you’re spending with your significant other is precious so you need a simple hairstyle that isn’t overly time-consuming. If you’re looking for a honeymoon hairstyle that’s soft and simple that won’t get in the way of your rest and relaxation, the chignon bun is exactly what you need.
How to Recreate This Look:
To recreate this clean and low maintenance look, you’ll need a 1) scrunchie, 2) bobby pins, 3) a curling wand or 4) velcro rollers and 5) those beautiful pearlescent hair clips that we mentioned earlier. Add some extra thickness to your hair by using a clip-in bun.
First, you’ll want to section off two face-framing pieces in the front and tie those away while you style the rest of your hair. Next, using your scrunchies, you should tie your hair into two loose low ponytails, one on top and the other on the bottom. Once you’ve created two separate ponytails, you’ll need to gently fold each ponytail into half crescent-shaped circles holding them in place with bobby pins. Be sure to use bobby pins that match your hair color so they are readily undetectable.
Next, you want to create very loose curls with those face-framing pieces you sectioned off in the beginning. If you’re looking to protect your hair from heat damage, you can create heatless curls by using velcro rollers and keeping them in for three to five hours depending on how easily your hair can hold a curl.
If your hair is on the super straight side, you’ll want to leave the velcro rollers in for a longer period of time to allow your curls to set. If you’d rather spend your time sunbathing and enjoying your romantic getaway, simply spritz on some heat protectant (remember to comb it through your hair using a wide-tooth comb like we mentioned earlier) and curl those two face-framing pieces for about five seconds each and enjoy the rest of your honeymoon. If your face-framing curls are a little too tight, don’t worry, within an hour, especially if you’re honeymooning in a tropical environment, those curls will drop down to soft waves in no time.
Wedding Day: Braided Bun
It’s finally your big day and you can practically hear the wedding bells chiming in your head from the moment you wake up in the morning. We couldn’t think of a more glamorous wedding day hair look fit for a bride than a braided bun. Equal parts functional and fabulous, a braided bun is the perfect hairstyle to pull your hair away from your veil and allow your significant other to be enchanted by your beauty on your big day.
How to Recreate This Look:
To recreate this look you’ll need: 1) a curling wand, 2) bobby pins, 3) a satin scrunchie, and 3) a strong hold hairspray.
Be sure to bring a hair extensions carrier to your wedding venue so your hair remains preserved. After clipping in your hair extensions, you should start by sectioning off two thick face-framing pieces at the front of your hair. Clip those sections away as you will be braiding them later. Next, grab two-inch wide-sized sections of your hair for each curl. By now, you know that you must apply a heat protectant spray before you apply heat to your hair. Once you begin the curling process, be sure to hold the curling wand to each section for no longer than five seconds at a time as you are looking to achieve soft and loose curls and be sure to only curl your hair about halfway down.
Once you reach the midpoint, you’ll want to mark the midpoint by bobby pinning your hair down in the center. Once you curled all of your hair and applied a bobby pin to the center section of each curl, grab the uncurled ends of your hair, section them into three parts and form one braid going down to the tip of your hair.
Now it’s time to unravel those two thick face-framing pieces and braid those down as well. Bobby pin those two braids down then grab the braid you created from the center point to tip of your hair to create a low chignon braided bun. For a more Bohemian-friendly look, unravel a few wispy pieces of your hair from the bun. Be sure to top your hair off with a strong hold hair spray.
And there you have it - a braided bun, fit for a princess.
Regular Day Glam: Side Braids
So your wedding festivities are over with and done, but you still want to keep your hair snatched to the nines. For days when you’re swapping out your wedding dress for a t-shirt and jeans, a side braid is the quintessential hairstyle. If you’re the type of girl who says “I’m on my way,” when you’re not even close to being ready, the side braid is the perfect last-minute hair look.
How to Recreate this Look:
To recreate this look you’ll need a: 1) flat brush, 2) clear elastic rubber bands, 3) a sectioning tail comb, and 4) a deep conditioning hair mask
Start by making sure all of your hair is detangled before beginning the braiding process. It’s important to thoroughly detangle your hair before braiding because tangled, matted hair will constantly form knots as you repeatedly attempt to cross your hair over the center section to make a braid. The first step towards making sure your hair is detangled is to apply a repairing hair mask after shampooing. This will help to moisturize and replenish your hair. A hair mask is an especially important detangling method if you have curly hair, as it is always best practice to detangle curly hair when wet to prevent breakage. If you’re looking to stimulate hair growth and soothe your scalp, use a root massager while you allow the hair mask to process in your hair. Let the hair mask penetrate your hair for 15-20 minutes then rinse it out with lukewarm water and you’ll notice your hair is softer than ever.
Once blow dried, clip in your hair extensions. If you have curly or frizz-prone hair, you’ll want to be sure to apply gel to your roots to slick down your hair before braiding. Next, using a sectioning rat tail comb, part your hair to either your right or left side. Separate your hair into three sections then start crossing the right strand over the middle strand of hair, then repeat that motion with the left strand of your hair. Continue to repeat this sequence until you have successfully braided your hair right before you reach the tip. You’ll want to leave out about an inch of the tip of your hair, then grab a clear elastic rubber band (or one that matches your hair color) to fasten the braid.
Now, you’ve mastered the art of a side braid.
What do you think of these looks? If you’re looking for hair extensions for your wedding make sure to check out our virtual hair color match tool to find the best shade for you.
Looking for more wedding hair inspo and styling tips? Subscribe to our newsletter to step up your hair game.