Hi my beautiful friends. How are you all doing? It's Mimi here today, and today's tutorial is going to be a five strand braid. I know, I'm so excited to show it to you guys. So recently, I did a four strand braid, and when I did it, I thought it was so hard at first and I thought I could never learn it or teach you guys and I did. Yay! After I did the four strand braid, I thought, "Okay, I need to challenge myself a little more. What's the next thing?"
Of course, I found out there's another braid, which is more complicated and it's a five strand braid. I watched a few tutorials. At first, I couldn't get it and I just kept trying and trying and I finally got it. It looks even more awesome than the four strand braid. I actually do like it more than a regular braid or a fishtail braid. This is my favorite right now. I've been wearing my hair like this quite a lot. It's really easy to recreate. I think it's a perfect look that you can wear back to school, back to college, university or wherever you're going or just at work. So, let's get into the tutorial.
For this tutorial, we're pretty much not going to need a lot of things. You will need a hair brush to brush your hair. I am wearing my Luxy Hair extensions in chocolate brown 160 gram set. I just clipped them in. I haven't bothered blending in or anything. You might also need some ... not you might, you will need some hair elastics. So, I'm using just really tiny ones that are like kind of see through, so they really blend with the hair and you can't really see the elastic. You will or might need some hairspray. This is my favorite All Natural Hairspray by Intelligent Nutrients. Again, depending on what kind of look you're going to go for, I'll explain at the end of the video, you might or might not need your curler. This is my Cortex Curler ... Yeah, it is a Cortex. This is my Cortex Perm Wand and this barrel is a one inch barrel.
The first thing you want to do is just brush the hair like always. So, just use a regular paddle brush. Start with the bottom and just brush it all the way up. Once you brush the hair, you want to split it into five equal sections. So, you want to just grab the hair and start splitting it into five equal sections. Some people say it's easier for them to break it into two sections and the four and five, but what I do is just grab one hand and with one hand, I try to make kind of equal sections. Then if I need to add more, add more. The key is just to try and make it as equal as you can possibly can, as you can possibly can.
All right, so just going to add more here. So, this is what you're going to have once you've split all the hair. You're going to have five different sections. The key to braiding this look is kind of understanding where all the sections go. So in your left hand, you will have section one and two and in your right hand you will have section four or five or the other way around. It doesn't really matter. Then the third section that will kind of just linger in there, just be like hanging in the middle. All you're going to be doing is bring section one over to an under third. Then the same thing you're going to do on the left hand. So, you're copying the exact same steps. So, first goes over second and under the third. I will show you now how you actually do that in practice.
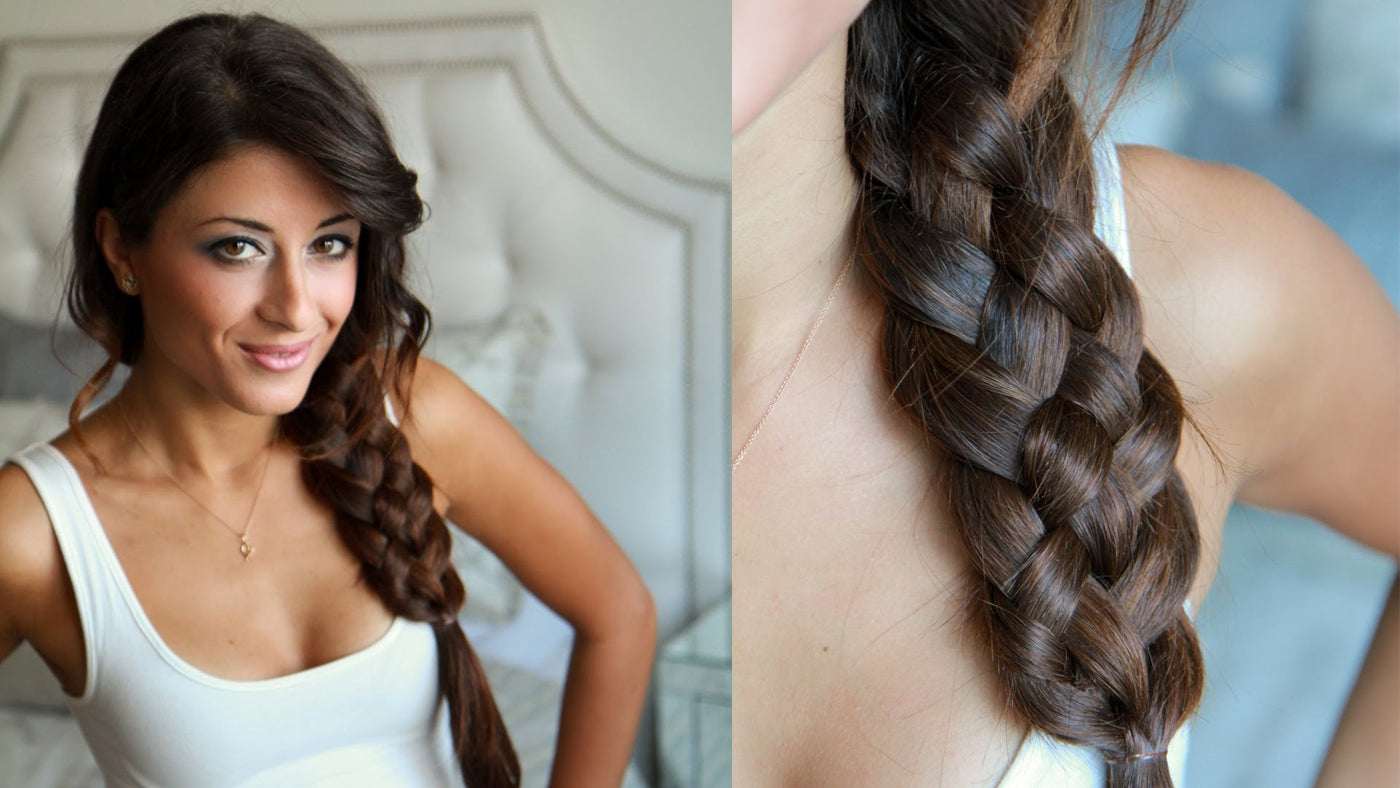
So, bring it over and then under and then kind of just push it up and then bringing the first from the left over and then under and push everything up, over, under and then over, under. It does really help saying over and under just so you kind of keep track of what step you're at, over, under, over, under and keep pushing it up for a more neat look. Over, under, over, under, over, under, over, under, over under, over and under. This is where I'm going to stop. All you want to do is just grab one of those elastic bands and secure it at the end. So, just secure it neatly at the end and it will look something like this.
Then what you want to do is just kind of pull on the strands of the hair to make this beautiful braid even thicker. Oh my God, it looks amazing. That's why I love this braid. There's just nothing like it. Just beautiful. You can either stop here or you can go ahead with me and do a little more romantic waves around the hair that's sort of falling out. If you do have layers, you'll have a lot of hair falling out. To make it a little prettier, romantic looking, what you can do is just grab certain sections on this side or on this side that are kind of falling out and start curling them away. You just want to hold it for a few seconds, not longer and release. It's like really pretty kind of wave that I will break down with my fingers after.
So, just curl it and let go. Then maybe I'll do a little bit on the bangs as well. Then just right away you just kind of break it with your fingers. So, all you have is sort of like ... you don't have any defined waves, just like kind of a mess here, like a pretty kind of mess. Then I'm going to go ahead and take a section from here and just curl it away as well. So, if you do have layers, you'll have a lot of this. If you don't, you can just pull out a strand and just curl it away. This will only take a minute or two, but I think it makes the whole look a little more romantic, a little more girly.
So, once you've curled it, you kind of like break it with your fingers. The last step is just to spray the hair with the hairspray. Once you spray the hair, you pretty much done. This is what it should look like. It's perfect. It looks so awesome. If you wear it to school, I'm sure all the girls will be asking you how you braided your hair or work, anywhere you're going to go, you're going to get people's attention because you don't get to see this kind of funky braid quite often on the streets or at school or anywhere really.
I hope you enjoyed this tutorial. Thank you so much for tuning in. Definitely give it a try and let me know if it worked. If it didn't work, try the four strand braid, practice it, practice it, and then once you understand how the four strand braid works, this one will be honestly super easy. Thank you so much again, and I love you guys. I'll see you in the next tutorial. Bye.
Five strand braid is easy to create and is a perfect hairstyle for school, college, university and even work. For this hairstyle I've used the 160g Chocolate Brown Luxy Hair Extensions.