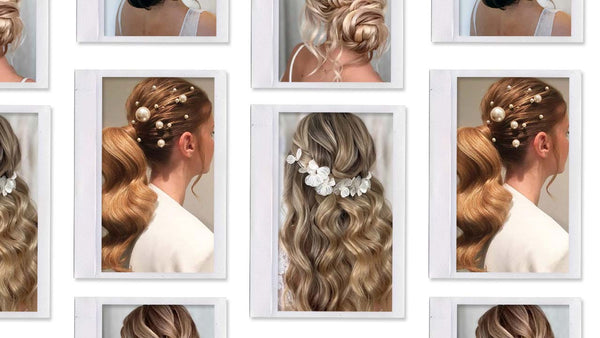
Wedding season is coming up and we've got you covered this week with a beautiful and unique Pull-Through Braid Updo. Whether you're one of the bridesmaids or the lucky bride herself, this cute yet simple to re-create hair style is the perfect look to complete any dress.
In this tutorial, our beautiful friend, Alex Gaboury, walks us through how to create this beautiful wedding and prom appropriate hair style. Watch the easy tutorial below or keep scrolling down for a step-by-step walkthrough.


What you'll need to re-create this hairstyle:
- A handful of clear elastics
- A handful of bobby pins
Step #1: Clip in your extensions
This step is completely optional, but highly recommended in order to achieve the volume and thickness that looks so good with a pull-through braid. In this tutorial, Alex is wearing her 220g Ash Blonde Luxy Hair Extensions. We recommend to clip two of your 4 clips wefts on to each other, with one just below the band. If you have thinner hair and want more volume for this look, feel free to clip in additional wefts.
Section a layer of your hair off starting at the top of your ears and clip it out of the way. Clip in your two 4-clip wefts as close to your roots as possible. Secure the clips in starting from the two middle clips, making your way outwards. This technique will help avoid any bulging from the wefts.

Step #2: Create a half-up ponytail
Part your hair how ever is normal to you (side or middle), and collect all of the hair that you initially clipped away at the top of your head and tie it together at the back of your head with a clear hair elastic to create a half-up ponytail. Be sure to leave a few pieces of hair around the frame of your face as we'll be using those pieces later.

To help kick-off that voluminous look, we recommend to create fullness at the crown of your head by holding the ponytail you just created in one hand to anchor it down, and using your other hand to pull upwards on small sections of the hair so that the ponytail you just created isn't laying so tight and flat on your head. This is a great technique to achieve volume without having to tease your hair.

Step #3: Create a second half-up ponytail
Grab a small chunk of hair from the sides of your head and bring the hair to the back and secure in a ponytail directly underneath your first ponytail with a clear elastic.

Optional step: Create a topsy-tail by flipping the ponytail up and through the hair to create twists in the pieces holding the ponytail together. This steps adds a pretty touch of detail to the hair, and also helps create a fuller appearance.

Step #4: Begin the pull-through braid
Now that the foundation of the hairstyle is complete, we can begin the pull-through braid. Start on the right hand side of your head - section about a quarter of your hair off and set it aside. Create another quarter section right beside it, and take that chunk and create a ponytail by securing with a clear elastic.

Take your first quarter section (the unsecured one) and divide the chunk into two equal-sized horizontal pieces.

Take the top half piece and bring it over the top of the ponytail created beside it, and take the other bottom half piece and bring it underneath the ponytail. At this point, the ponytail should be in-between those two equal pieces created - set it aside and ensure it is out of the way.

Grab another quarter sized section of hair beside the ponytail you just created, and take the two chunks of hair that you just split through your original ponytail with, and create a new ponytail at the same height as your previous one.

Take your first original ponytail (the hair that is now sitting aside), divide it into two equal-sized horizontal pieces, and split the two sections of hair through the new ponytail you just created.


Repeat the steps above so that the braid wraps around your entire head. It should take about 4-5 more sequences in order to fully cover the back of your head.
On your last sequence, leave a bit of loose hair rather than creating a pull-through all the way over - we'll strategically pin these pieces away when finishing up the look.

Step #5: Pancake the braid
With your index and thumb finger, gently tug at the outside of each pull-through to ensure the look is more full and voluminous. Be sure to go slowly and be gentle with each tug, as you don't want to pull out too much and make the braid messy-looking.

Once you're happy with the size of the braid, secure the ends in to place by sliding a few bobby pins right through the elastic. This will help ensure that the pull-through braid lays flat on your head.
Step #6: Secure tail of hair
The tail ends of your braid that were previously left behind can now be pinned away. Wrap the two sections around one another and secure the tail underneath your pull-through braid so that it remains hidden. Use a handful of bobby pins in order to ensure the hair remains secured.


It's as simple as that! With 6 easy steps, you can have your wedding or prom hair ready to go. How are you wearing your hair this wedding/prom season? Let us know down in the comments below!