Never underestimate the power of the classic bobby pin! This tiny hair accessory from your local drugstore may seem unassuming, but it’s making a major comeback. Bobby pins and hair clips have always been a retro favorite and are now making regular appearances on red carpet events, tv shows in fashion magazines, just like hair extensions.
While perusing the hair aisle at your local pharmacy or beauty store, it’s important to know which pins to use for your specific hair type and the style you want to achieve. Choose a pin that matches your hair color to discreetly hold your hair in place or experiment with brighter colors and metallics for a bold look, as shown in the following video.
Do you wear hair clips or bobby pins as fashion accessories? What are your favorite ways to wear bobby pins? Let us know in the comments below.
By the way...
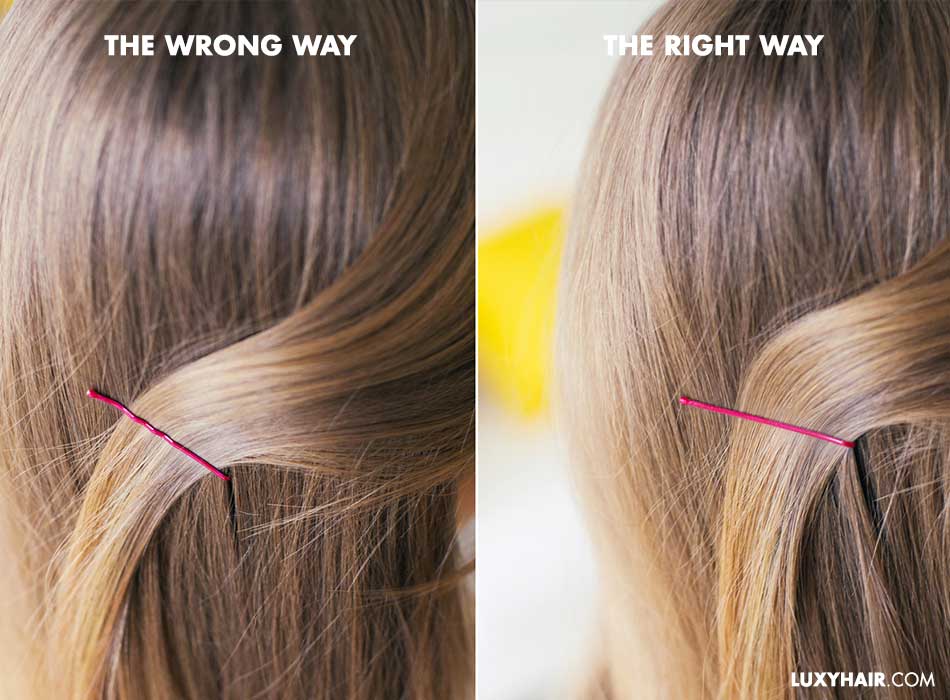
Did you know there's a correct and incorrect way to wear a bobby pin? Instead of sliding the bobby pin with the wavy side up, flip the bobby pin over and apply it wavy side down. The ridged grooves will hold on to the hair better, with a polished, flat surface on top.
Only have boring black bobby pins at home?
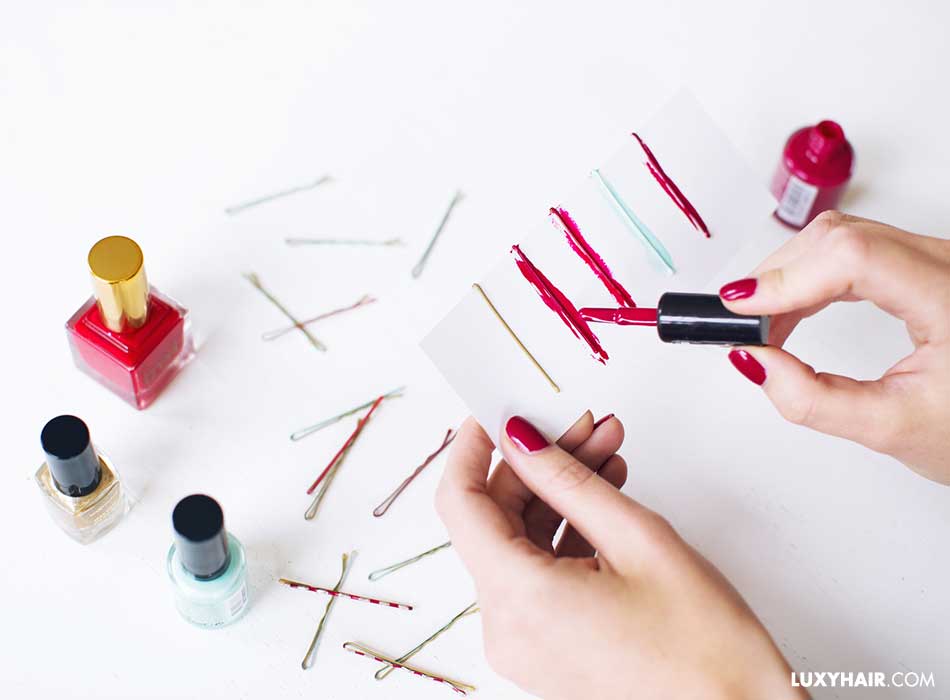
For these hairstyles with bobby pins, Lara uses metallic and embellished bobby pins. The idea is for them to stand out and work as a hair accessory, rather than simply hide and hold hair in place. If you don't have similar bobby pins available, no problem! Clip a few pins to a piece of paper, then take your favorite metallic or colored nail polish and paint the bobby pin. You can even DIY a few pearls or embellishments onto the bobby pin to take your look to the next level.
Hairstyles with bobby pins
First, apply your Luxy Hair extensions and curl them
Lara wears the Seamless Ombre Blonde Luxy Hair extensions in this video. Start by popping in your Luxy Hair extensions curling them with a wand to add loose waves. Use a larger barrel curling wand, about 1 1/2" to get those looser looking waves. Wrap each section around the wand and only hold for a few seconds before letting go—this will result in natural, light waves. Be sure to use a heat protectant before curling your natural hair as well as your extensions, and to use a maximum heat setting of 250F.
Hairstyle 1: Stacked and edgy
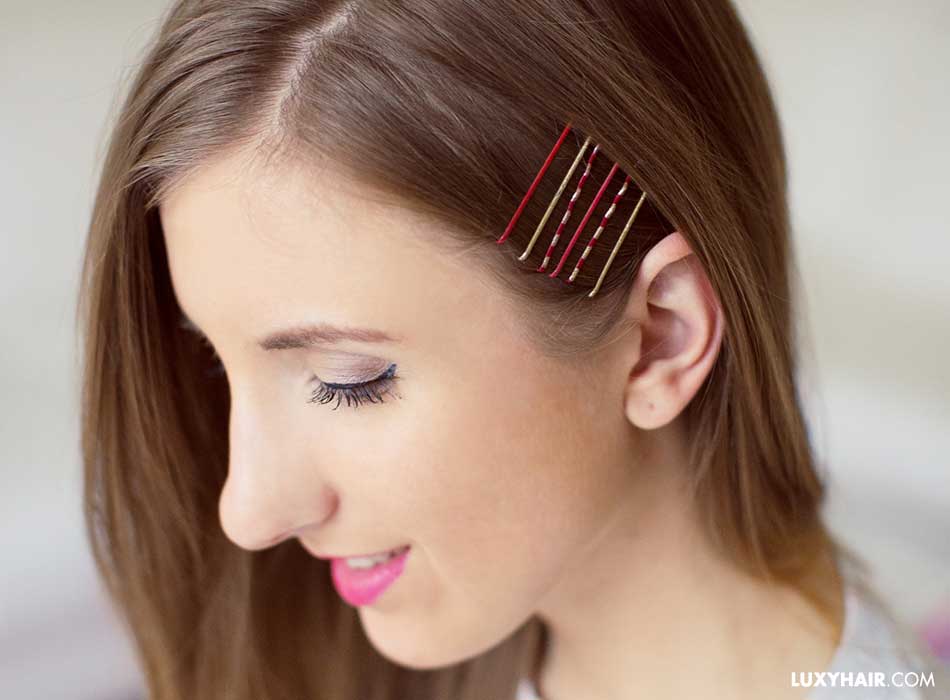
Step 1
Begin by parting your hair down the middle. You can do a casual finger part for a more natural line or use a fine tooth comb for a clean and straight center part.
Step 2
Smooth out your hair with a hairbrush, then add in several bobby pins starting close to your temple and working your way down. Leave about half an inch of space in between each clip so that your hair is exposed.
This is a great look for when you want to leave your hair down but also add an edgy flair to your look.
Hairstyle 2: the criss-cross
Step 1
Start by creating a deep side part. Use a bit of hairspray to hold your hair in place if need be, using a bit of hair oil to smoothen down flyaways.
Step 2
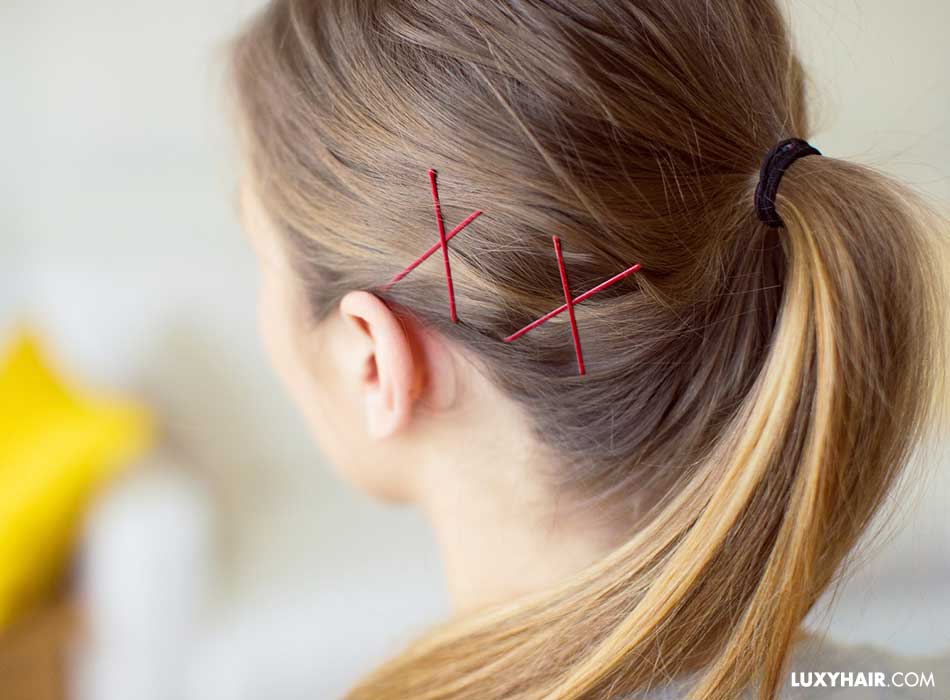
Tuck your hair behind your ear on the side closest to the part. Then, slide a bobby pin diagonally toward the back of your head.
Step 3
Slide a second bobby pin over the first one, diagonally toward the front of your head, creating an X shape.
Step 4
Slide a third bobby pin horizontally behind your ear underneath the X.
A fun variation on this style is to gather all your hair into a ponytail and to create two X shapes on one side. The possibilities are endless—you can create what's most comfortable for you.
Hairstyle 4: the triangle
Step 1
Brush out your hair and smoothen down flyaways.
Step 2
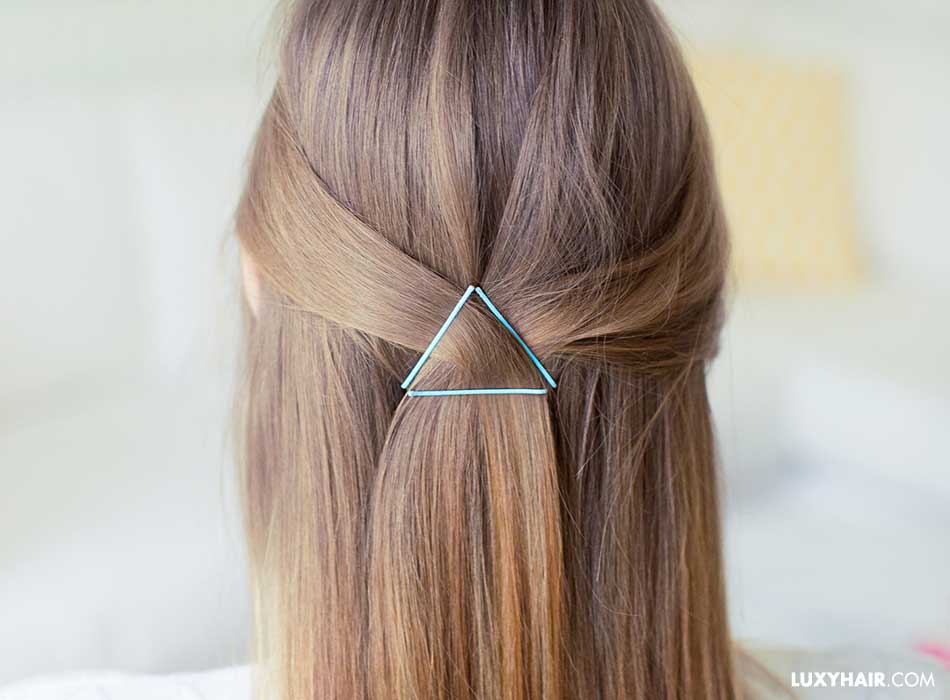
Take a section of hair from either side of your hair and gather your hair toward the back of your head.
Step 3
In the area where you would typically add a hair elastic when doing a half up look, you're going to add in the bobby pins. Slide in one pin at an upward angle holding down one section of hair and do the same with another side, creating an upside-down V. Finally, add a third bobby pin to create a complete triangle.
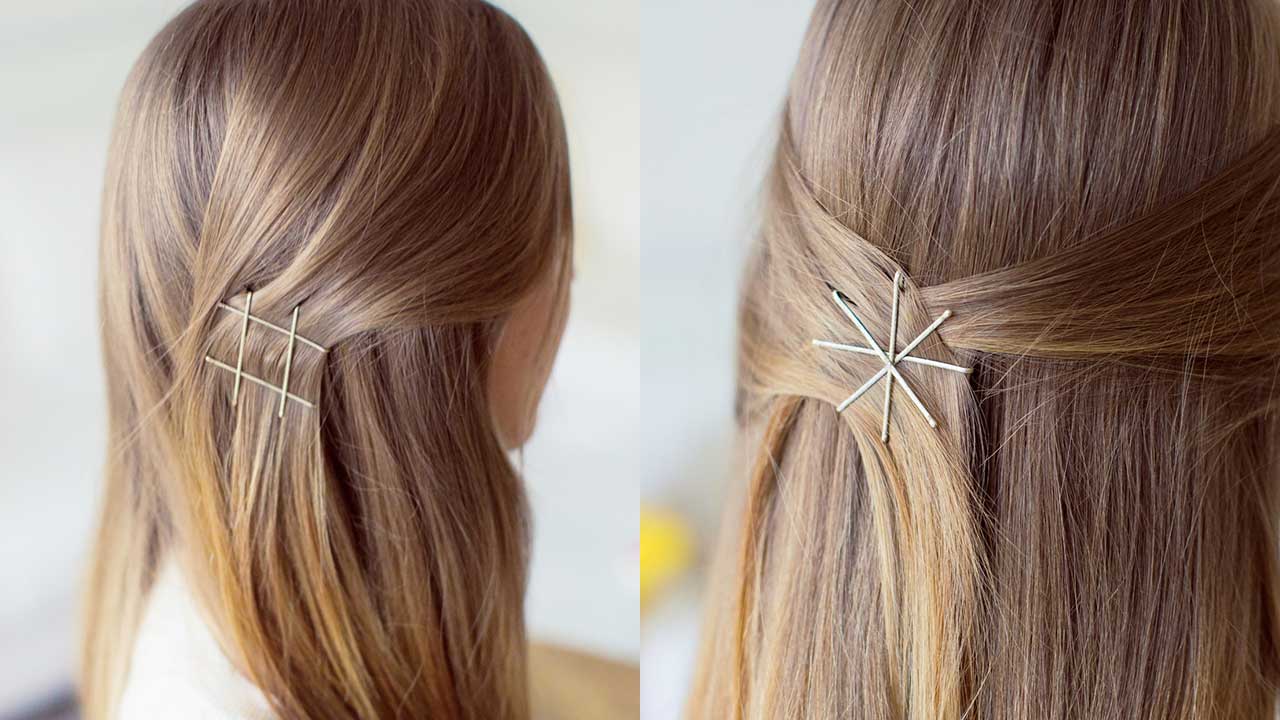
Hairstyle 5: the snowflake
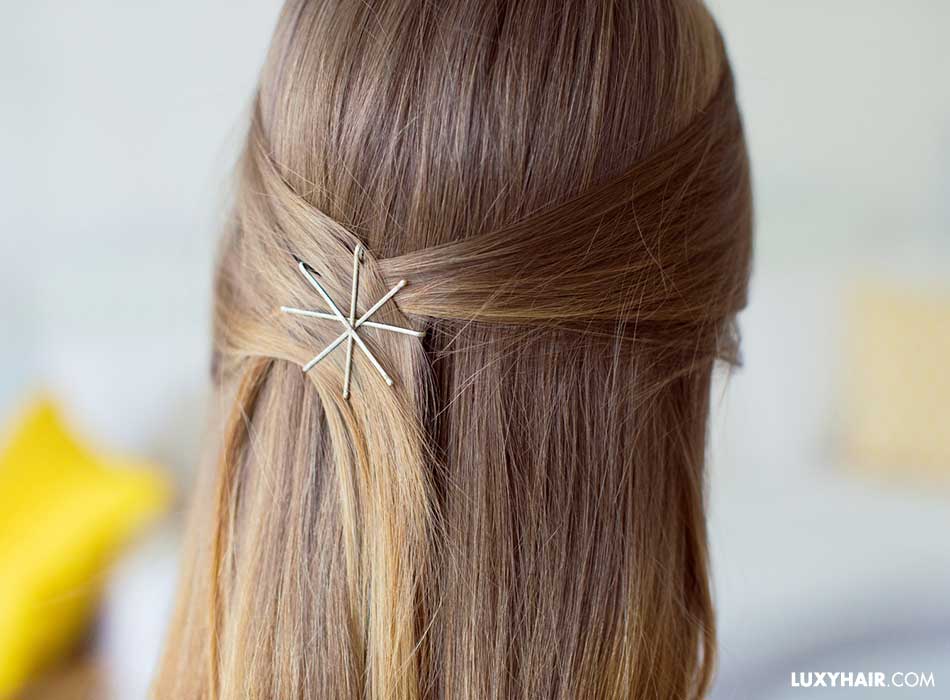
Baby, it's cold outside! Embrace the snow by creating this bobby pin snowflake. We love light blue or silver rhinestone embellished pins for this look.
Step 1
Brush out your hair and smoothen down flyaways.
Step 2
Again, take a small section of hair from either side of your head, gathering it toward the back of your head.
Step 3
Slide a bobby pin in vertically, to hold both pieces of hair down. Then, slide a bobby pin in horizontally to create a plus sign. Finally, slide 2 bobby pins in diagonally to finish up the snowflake's shape.
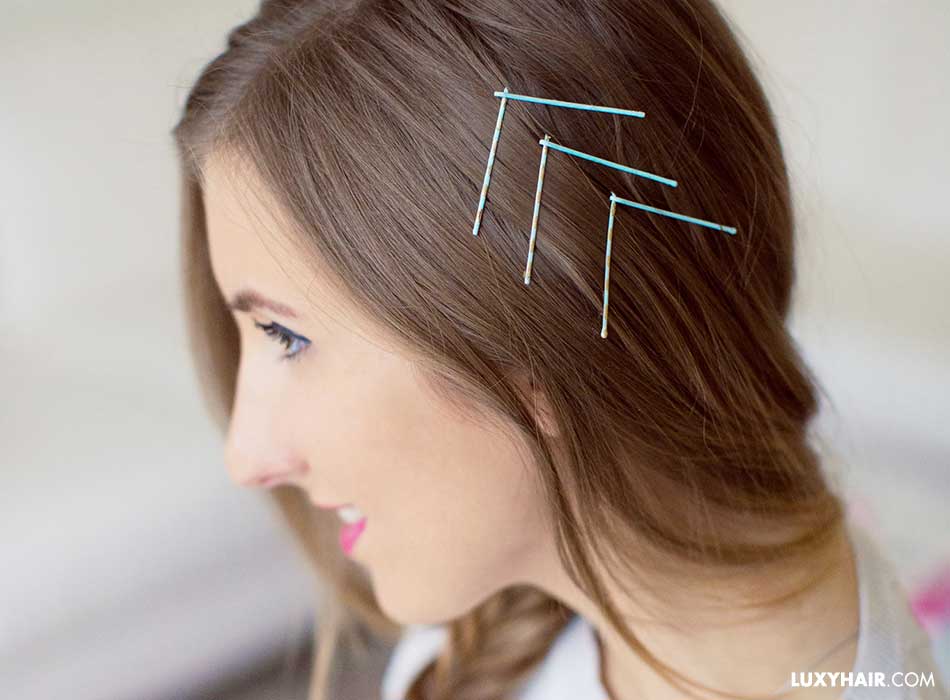
Bonus hairstyle 6: the chevron
Step 1
Start with either a middle part or side part—whichever is most comfortable for you
Step 2
Add three bobby pins diagonally toward the back of your head, leaving an inch in between the pins
Step 3
Add three more bobby pins diagonally toward the front of your head to create three V shapes.
Bonus hairstyle 7: the hashtag
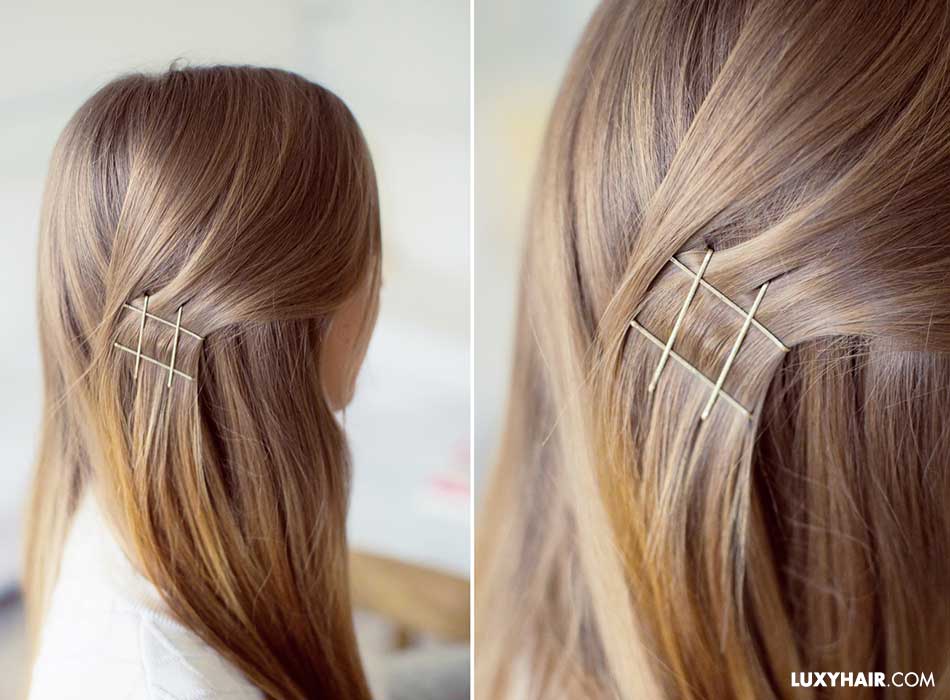
This one's for all the Instagrammers out there!
Step 1
Gather one side of your hair toward the back of your head.
Step 2
Slide two bobby pins in vertically side by side, parallel to each other.
Step 3
Complete the hashtag by sliding two more bobby pins in horizontally, parallel to each other.
Do you wear bobby pins regularly? Which hairstyle is your favorite? Let us know in the comments below and be sure to share your hairstyle recreations with us with the hashtag #myluxyhair on Instagram.
Written by: Nadia Matar
